Illustrator, Tutorials, Uncategorized
How To Use The Pen Tool In Illustrator Tutorial: Part 2/3
This post first appeared on www.vickiwenderlich.com.
Program: Adobe Illustrator CS4
Skill Level: Beginner
This is Part 2 in a three-part tutorial covering the basics of the Pen tool in Adobe Illustrator. Find Part 1 here.
When making the background in Part 1, we covered creating shapes with straight lines and editing the anchor points afterwards.
Now, we will create shapes with curvy lines and edit the anchor points and their handles as we create the shapes.
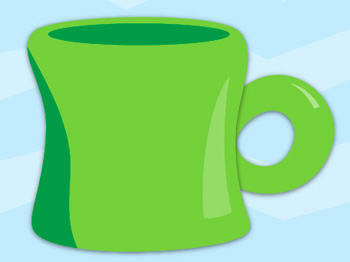
Part 2: Making The Mug
Lock The Background and Create A New Layer
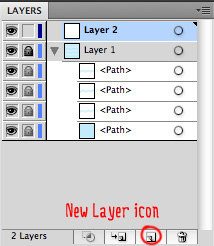
Go to the Layers panel.
Click the box to the left of Layer 1. This locks the shapes so you don’t accidentally edit them while working on something else.
Click the New Layer icon to create a new layer.
Make The Mug Body
While working with the Pen tool, if you press and hold Command, it temporarily switches to whatever your last selection tool was. This is especially useful if your last selection tool was the Direct Selection tool, since it lets you move anchor points around.
Press A (to select the Direct Selection tool). Now press P or select the Pen tool from the toolbar.
Place The First Anchor
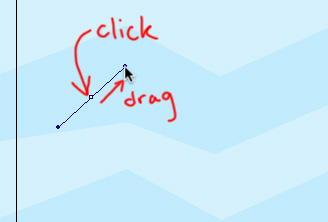
Click on your artboard and drag to the upper right to create a point with a smooth direction line.
Place The Second Anchor
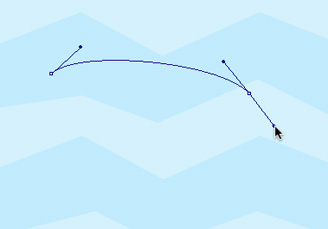
Click and drag again, this time to the lower right, to place a second smooth point.
Place The Third Anchor
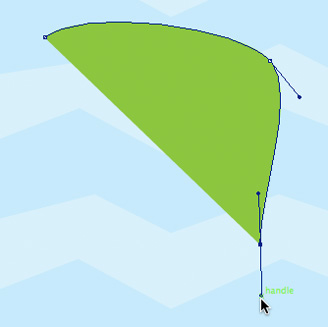
Click and drag again to place a third smooth point. with the direction line mostly vertical.
Place The Fourth Anchor And Move It
Click further down, and drag to make a fourth point. If you are anything like me, your shape will have started to go awry and you will want to correct it by moving your anchor points.
You don’t have to wait until you are finished with the shape to move the anchor points and handles around.
Press Command, then click and drag the fourth anchor point. Reposition it where you like, and let go. Stop pressing Command. The next time you click on the canvas, it will resume placing anchor points!
You can edit anchor handles the same way. Press Command, then drag the handles around.
Finish The Shape
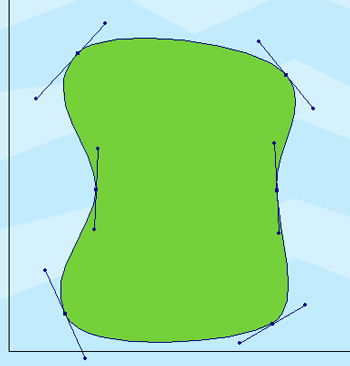
Continue clicking and dragging with the Pen tool until you have finished the shape.
It should look somewhat like the image to the left.
Move The Anchor Points And Handles
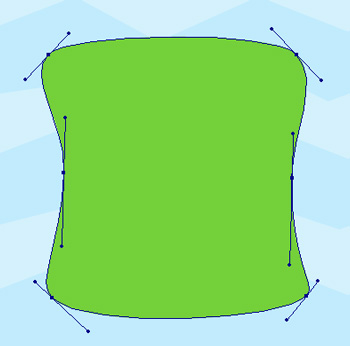
Press Command as you drag the anchor points and handles around until your shape more closely resembles the mug shape to the left.
You can also press A to switch to the Direct Selection tool at this time to edit without having to press and hold Command.
Mug Highlight
This mug needs a highlight and a shadow. First we will create the highlight. Choose the Direct Selection tool (shortcut A) if you haven’t already. Deselect the mug body by clicking elsewhere on the canvas. Click the white swatch in the Swatches panel.
Place The First Anchor Point

Choose the Pen tool again (shortcut P).Click and drag a smooth point over near the right of the mug, as shown.
This will be the top corner of your highlight.
Place And Convert The Second Point
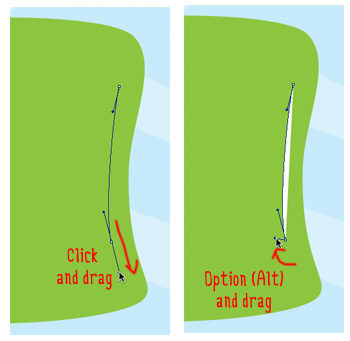
Click and drag another point, as shown.
Now hold down Option (Alt), and drag one of the handles of the last point you created.
This breaks the direction line, converting the smooth point to a sharp point, without having to switch out of the Pen tool.
Place the handle as shown.
Release Option (Alt).
Place And Convert The Third Point
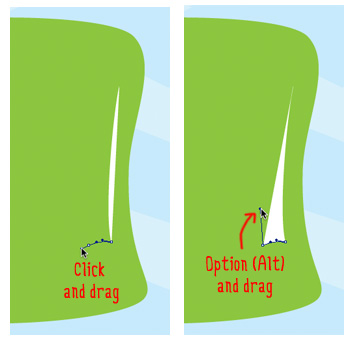
Click and drag to place the third point.
Press Option (Alt) again and edit the handles as shown.
Close The Shape
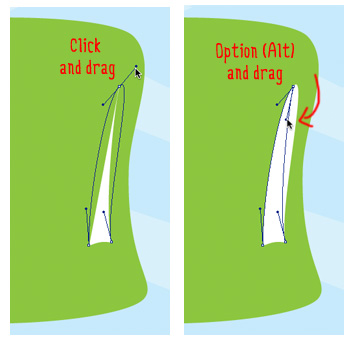
Release Option (Alt). Click and drag your first point to give it handles. It will be a smooth point.
Hold down Option (Alt) once more and drag the handles around until they look like the image to the left.
If you decide you want a sharp point to be a smooth point again, hold down Option (Alt) and click and drag the sharp anchor point. This will make the handles into an unbroken direction line again.
Tweak The Highlight Shape
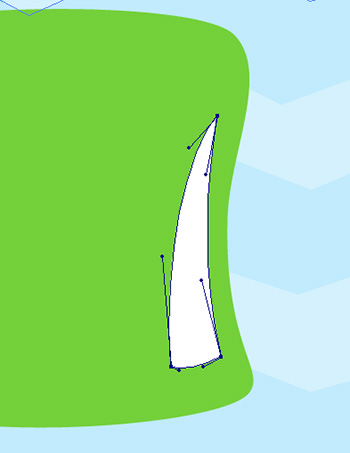
Press Command and drag the anchor points and handles around to move them to the right positions.
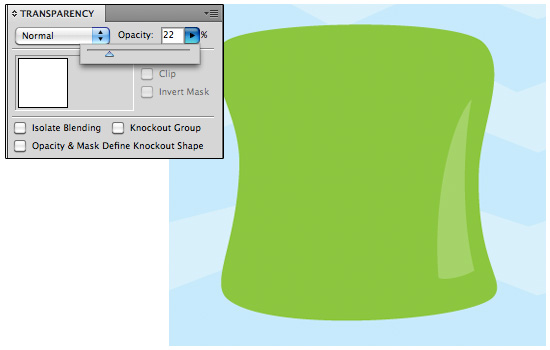
Lower The Highlight Opacity
Mug Shadow
We’re going to make the shadow a little differently since we want it to go exactly up to the left edge of the mug.
Create An Overlapping Shadow Shape
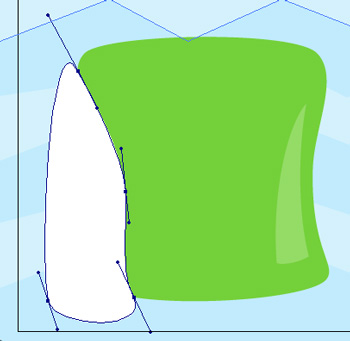
Select the Pen Tool again if you need to (shortcut P), and use smooth points to create a shape similar to the one seen here. Note that it should overlap the edge of the mug.
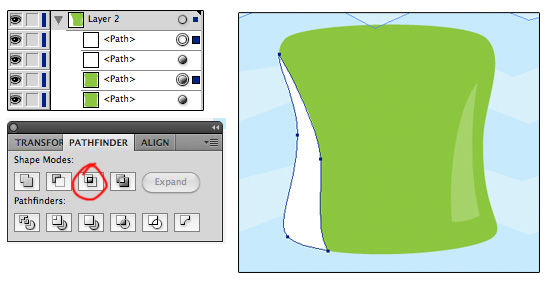
Use Pathfinder Tools To Combine The Shapes
Choose the Selection tool from the Toolbox (or use the shortcut V). Click the mug body and copy it in place by typing Command-C and then Command-F (The F is for copy-in-front).
Select the top-most mug body and the overlapping shadow shape in the Layers panel.
Next, we need to open the Pathfinder palette, which allows us to combine shapes. Go up to Window and select Pathfinder.
In the Pathfinder palette, click Intersect. This creates a shape consisting of only the intersecting parts of the two shapes.
Change Shadow Fill
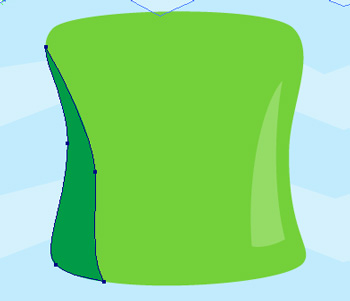
Click the dark green swatch in the Swatches panel to change its Fill.
Making The Handle
For the handle, we will create, edit, and combine two ovals.
Create First Ellipse
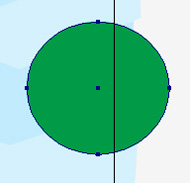
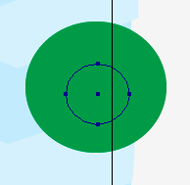
Type L to select the Ellipse tool (or select it from the Toolbox).Off to the side of your mug, drag out an almost circular ellipse.
Create Second Ellipse
Subtract Top Ellipse From Bottom Ellipse
Type V to switch to the Selection tool. Press Shift as you click both ovals to select them.
Go to the Pathfinder palette and choose Minus-Front. This subtracts the top shape from the bottom shape.
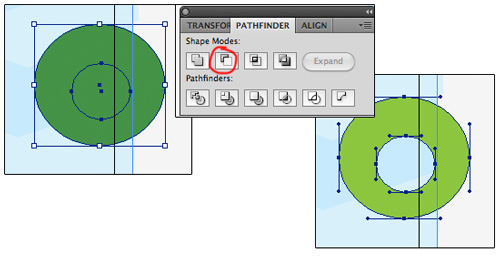
Shapes like rectangles and ovals have anchor points and handles just like shapes created with the Pen tool, so you can edit them the same way.
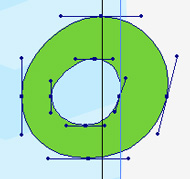
Switch to the Direct Selection tool (shortcut A).Click the handle ring shape once to select it. You can see all of the anchor points and handles now.
Move the anchor points and handles a little bit so that the ovals are a little less perfect.
Mug Handle Highlight
Now you can practice your edit-as-you-go Pen tool skills! Make a highlight as shown using the same method you used to create the mug body highlight.
Create Highlight Shape
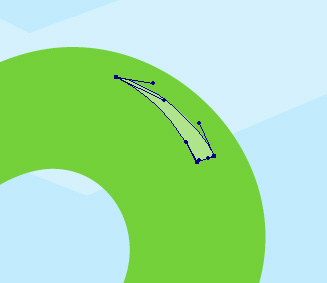
Remember, when using the Pen tool, press Command to move the handles and anchor points, and press Option (Alt) to convert the smooth points to sharp points by dragging the handles.When you are done, lower to opacity to about 22%.
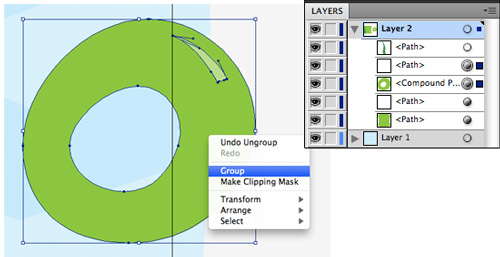
Group the Handle Shapes
Select the mug handle shape and handle highlight shape in the Layers panel. Right-click and select Group. This links the two shapes together so that whenever you move them, they move as a unit.
Move Handle Into Position
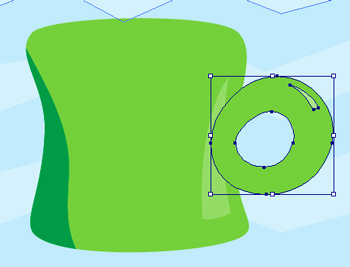
Choose the Selection tool (shortcut V) and drag the handle over to the mug.Place it as shown, overlapping the mug body.
Change Layer Order
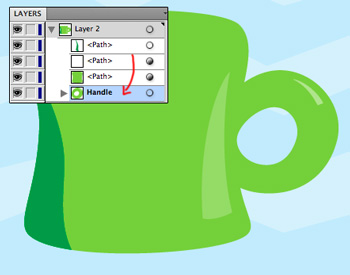
Right now the handle is on top of the mug.Go to the Layers panel and drag the handle group underneath the mug body shape to move the handle to the back.
Creating The Back Of The Mug
For the kitten to fit “inside” the mug, we need a mug front and a mug back.
Make An Ellipse
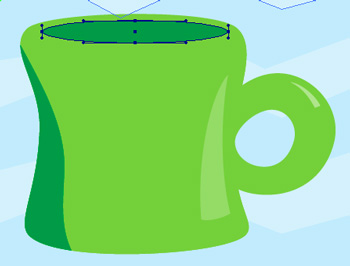
Use the Ellipse tool (Shortcut L) to drag out an ellipse at the top of the mug as shown.Copy it in place by pressing Command-C and then Command-F.
Copy Mug Body
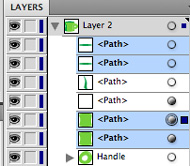
Select the mug body from the Layers panel and copy that in place as well.
Subtract Oval From Mug Body
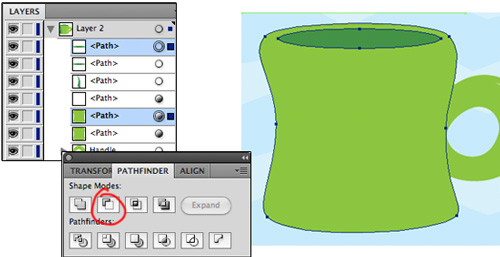
Make A Rectangle
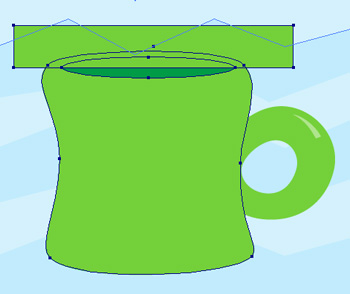
Select the Rectangle tool (Shortcut M) and drag out a rectangle that overlaps the top of the mug.It should intersect the widest point of the ellipse.
Subtract Rectangle From Modified Mug Body
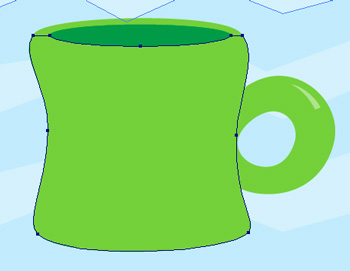
Select the rectangle and the mug body shape with the hole from the Layers panel.Once again, go to the Pathfinder palette and click Minus-Front. You should end up with the shape shown to the left.
Reorder Layers And Group
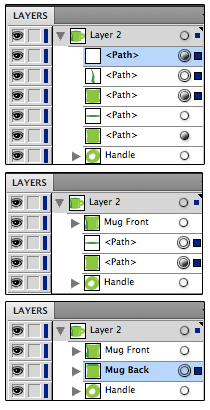
In the Layers panel, drag the dark green shadow shape and the highlight shape on top of the altered body shape. Select all three.Group them by right-clicking and selecting Group. Rename this group “Mug Front”.
Select the dark green oval and the original mug body shape. Group them, and rename the group “Mug Back.”

In this part of the tutorial you learned:
- How to use keyboard modifiers Option (Alt) and Command to edit anchors and handles while creating a shape with the Pen tool
- How to combine and subtract shapes using the Pathfinder palette
- How to edit the anchor points and handles of shapes such as ovals
Part 3/3 of this tutorial will involve extensive use of the Pen tool and editing the anchor points and handles. You will use your new skills to create the cute kitten character, and finish off the artwork by adding layer effects!


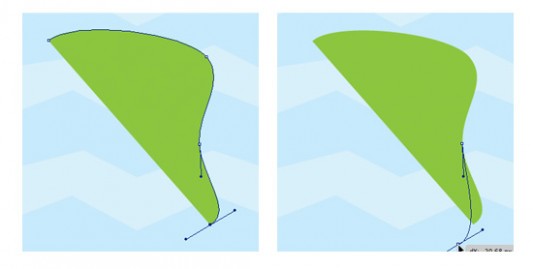
When I close the mug shape in step in “Finish the Shape” it makes not a smooth curve, but what looks like a corner with only one handle. Is there a way to make it all smooth like yours with two handles?
Thanks
Hi Jason,
When you close a shape, make sure to click and drag to bring out the other handle. If you just click, it will only have the handle from when you started the shape.
Let me know if this fixed it!
Yes that indeed fixed it! Thank you for the fast response. Hopefully I didn’t mess up the layers and grouping towards the end. I’ll find out in #3