Illustrator, Tutorials
How To Use The Pen Tool In Illustrator Tutorial: Part 1/3
This post first appeared on www.vickiwenderlich.com.
Program: Adobe Illustrator CS4
Skill Level: Beginner
The Pen tool is one of the best features of Illustrator. It lets you create pretty much any shape you can imagine, in resizable vector form.
Using the Pen tool may not be intuitive to many people, but mastering it is well worth your time. This tutorial helps you learn while making something fun!
You may be totally new to Illustrator and/or the Pen tool, but after this three-part tutorial you will know no fear! And you will have this adorable mug of kitten to keep!

Part 1: Making the Background
Create a New Document
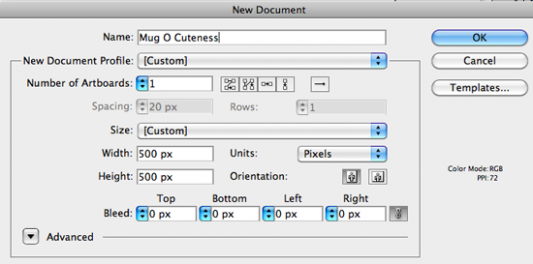
Create a new document with the following attributes: one artboard, sized 500×500 pixels.
Give it a name now, like “Mug O Cuteness”. Hit OK.
Collect Your Colors
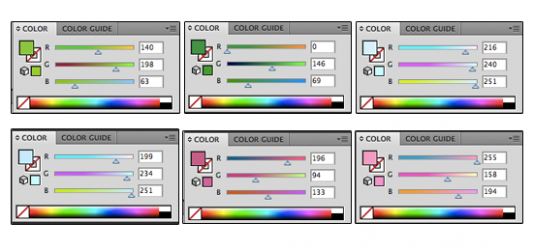
Go to the Color panel, and create a swatch with the RGB values shown in the first color below.
Click the arrow in the upper right and choose “Create Swatch” to save it to the Swatches panel. You can also simply click the color in the Color panel and drag it to the Swatches panel to save it.
Do the same for each of the six colors.
Make The Background
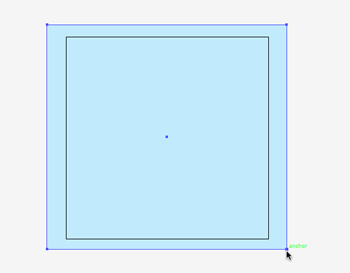
Click the darker blue swatch in the Swatches panel.
Press M to select the Rectangle tool, and drag out a rectangle that overlaps the borders of your artboard.
Press V to switch to the Selection tool, and click somewhere outside of the rectangle.
This deselects the rectangle so that we can change colors for our next object.
Click the lighter blue swatch.
Select The Pen Tool

Type P to use the pen tool (or click the icon shown to the left, found in the Toolbox).
Click To Make Anchor Points
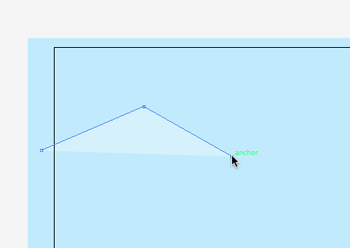
Click towards the left of the screen. This creates your first anchor point.
Move your cursor over and up to the right and click again to create another anchor point. A straight line appears between the points.
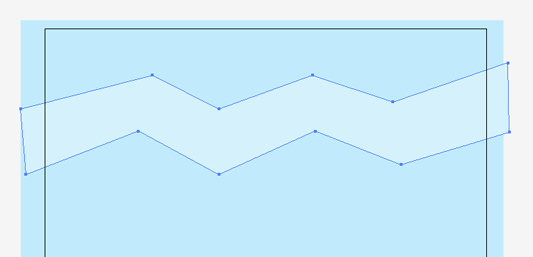
Continue to place anchor points, creating a zigzag shape.
Once you reach the end of the screen, move down and continue to click and create points back to the other side of the screen.

Click on your first point to close the shape. Notice that when you mouseover the first point, the mouse pointer changes: a little circle appears.
That tells you that if you click there, the shape will be closed.
Edit Anchor Point Location
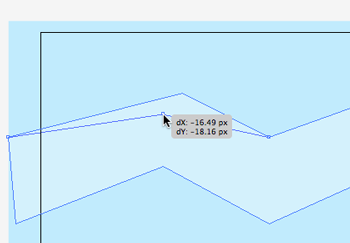
You can change the location of the points by typing A to use the Direct Selection tool (or select it from the Toollbox).Click the shape to select it, and then click the point you want to edit.
Notice that unselected points are empty circles, and the point you selected is a filled-in circle.
Now click and hold down as you drag the anchor point to a new location. Move any of the other points you like.
Make Straight Lines Into Smooth Curves
What if you change your mind and want a wavy shape instead? No problem! You can easily edit the points to give them handles. The handles allow you to control the amount that the line curves as it arcs toward the next point.
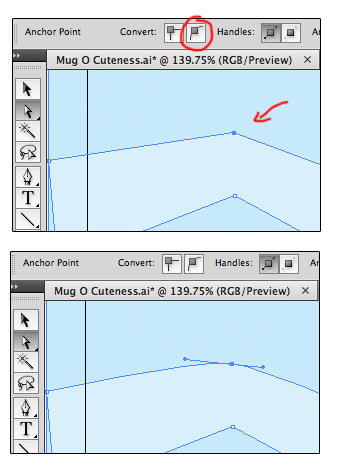
You should still be using the Direct Selection tool, but if you aren’t, type A to use it. Click on one of the shapes, and then on a point.Now go up to the Options bar, usually found at the top of the screen. Click the icon circled in red.
This gives the point handles, and makes the point into a curve.
Select the other points you wish to change (hold down Shift while selecting to select multiple points), and click the icon again.
Change The Curves By Dragging The Handles
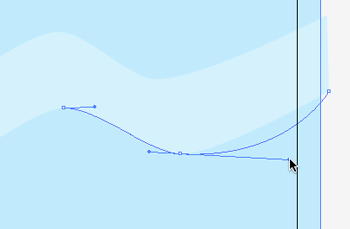
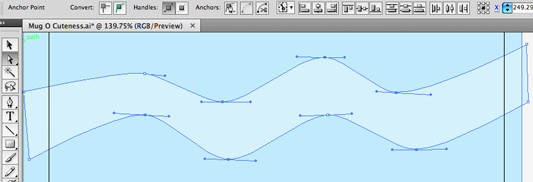
You can change the shape of the curve by moving the handles.Click one of the points. Click and drag one of the handles, and notice how your shape’s outline shows you the new path.
Let go, and the shape is updated.
Convert The Handles To Make Corners
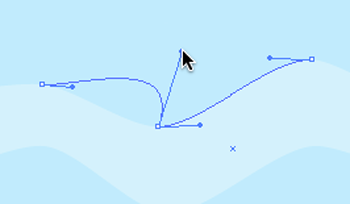
You can change the smooth points to corner points by converting the handles, which means breaking the direction line (the handles) into two separate direction lines.Select the point, and hold down Option (Alt) as you click and drag one of the handles.
Now you can control the curve on each segment while they connect at a sharp corner.
Change Curves Into Straight Lines
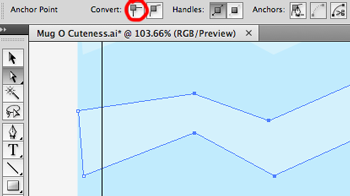
Make all of the lines straight again by selecting them with the Direct Selection tool (Shortcut A) and clicking the other handle icon in the toolbar (circled in red).
Copy The Zigzag Shape
When you are finished, type V to switch to the Selection tool (or select the Selection tool from the Toolbox).
Hold down Option (Alt), click on the zigzag shape, and drag it down. This creates a copy of your zigzag shape.
Do this one more time, and arrange the three zigzag shapes over your rectangle.
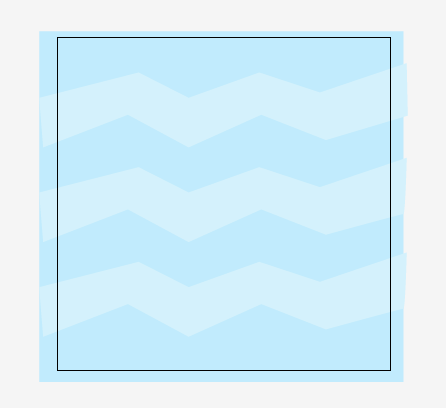
Save your document.
Congratulations! You are now able to use the pen tool to:
- create simple shapes with straight lines
- move the anchor points
- convert the corner points to smooth points (and back again)
- edit the handles to control the curves
In Part 2, we will move on to creating smooth curves with the pen tool, and editing the points as we go rather than after we finish the shape.
If anything is unclear, please let me know in the comments!



Thanks for the tutorial Vicki – I’d been frustrated for a while with even getting the basics of illustrator down and this has helped immensely with understanding some basic controls – the pen tool felt counter intuitive before but now it’s making sense. Great job.
Thank you Vicki. You make it so simple and clear. On to Part 2!
Thanks for the very good tutorial.
lovely – you have helped me greatly – i can now use then pen tool properly!!
Thanks! Been struggling with the pen tool and your tutorial was easy to understand and has set me on my way!
this was really helpful. thanks so much :)
You have a gift for teaching! Perfect way to word and explain using the pen tool :)
Thank you so much for this tutorial. Extremely helpful to a total noob like me!