Illustrator, Tutorials
How To Make A Galaxy In Illustrator
This post first appeared on www.vickiwenderlich.com
Space scenes are always fun for games or illustrations. But you can’t just have stars and spaceships – you need things like galaxies or planets to really make it feel like space!

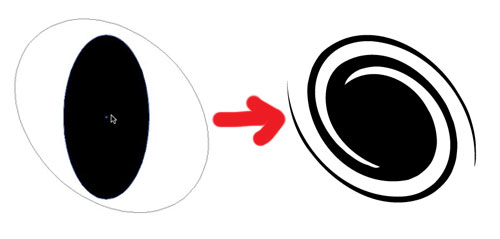
In this tutorial you will learn how to make a vector galaxy shape in Illustrator using the Ellipse and Twirl tools.
Once we have our shape, we will make it look cool and glowy by applying certain effects to the shape fill.
Let’s get started!
Setup
Open a New Document with a 500×500 pixel artboard.
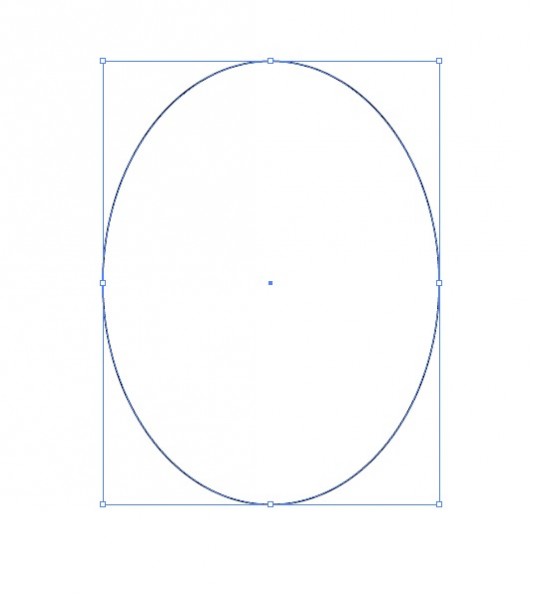
Choose the Ellipse tool (shortcut L) and drag out an ellipse, about 150 wide by 300 tall.
You don’t have to be exact – remember, since this is vector-based, you can resize the galaxy later to fit your needs.
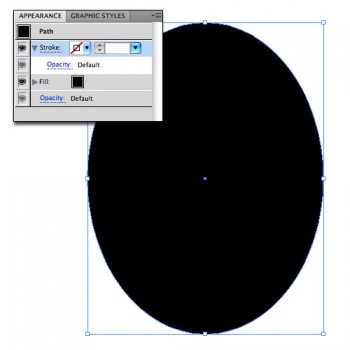
Go to the Appearance panel and get rid of the stroke.
Change the Fill to any color but white – just so you can see what you are doing.
Using The Twirl Tool In Illustrator
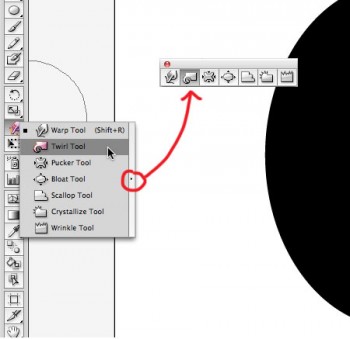
Go to the Tools panel and find the Warp tool.
Click and hold down on the Warp tool until the menu with the hidden options pops up.
Go over to the arrow on the right side and release the mouse.
It should pull out the toolbar so that you can see all of the tools and move it around. Choose the Twirl tool.
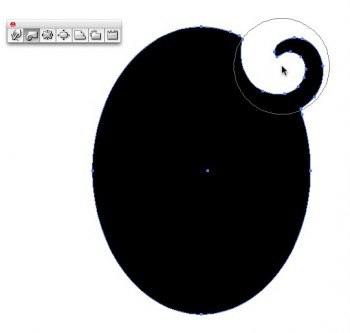
Your cursor now has a circle around it.
The way Twirl works is that it will warp everything inside the circle into a spiral.
To get an idea of how this works, position your cursor on the edge of the ellipse and click for a half-second.
The edge of the ellipse should now look something like this.
The amount of spiraling will depend on the Twirl tool’s settings. Go to Edit>Undo or type Command-Z to undo the Twirl.
To make a galaxy, we need to first tweak the Twirl settings. Go over to the Warp Tools panel and double click on Twirl. This opens a dialog box in which we can change the settings.
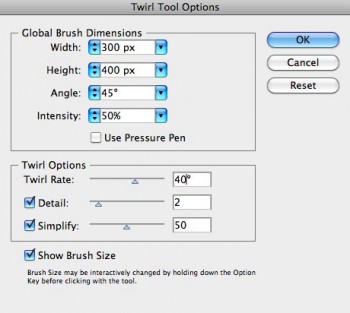
Height and Width: You want the Global Brush (the shape around your cursor) to be bigger than your ellipse, even if it is rotated.
Make it 300 pixels wide and 400 pixels tall. Galaxies are usually shaped like an ellipse, and the shape of the brush is the overall shape of the twirl.
Angle: Set this to 45 degrees, since galaxies are usually at an angle.
Intensity: this controls the amount of the effect, which basically comes down to how fast it will twirl (similar to the Twirl Rate below). Leave this at 50%.
Twirl Rate: Just means the speed at which it twirls. Choose a low Twirl Rate to slow down the twirling so that you can control it better, or a higher one to speed it up. Leave it set on 40 degrees for now.
Now go over to your ellipse, make sure it is inside your cursor outline, and click.
If it didn’t twirl enough, click again (or Undo and click longer next time). If it twirled too much, Undo and change the Twirl Rate to something lower, like 10 degrees.
Try clicking briefly as well as clicking and holding for a second or two. Notice that how no matter how long you click, it never extends the spiral into the center area. It just keeps spinning the outer edges.
If you want the “arms” of the galaxy to extend from a smaller inside area, you need to change the width of the original ellipse.
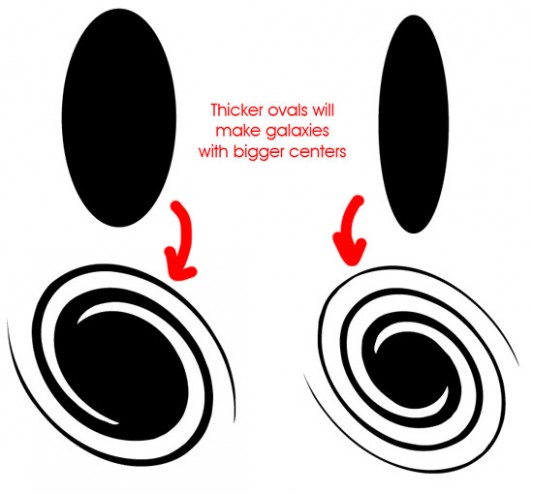
Thinner ellipses will have smaller center areas; thicker ones will have larger center areas.
Notice how perfect the curves are, and how perfectly spaced the “arms” are. Real galaxies are never this regular. They have some variance in the arms and the curves. You can introduce some abnormalities into your galaxy and make it look more real by moving your cursor while you click.
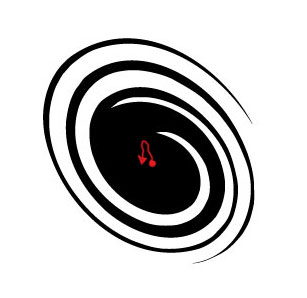
You may need to slow down the twirl rate so that you can control this and see what you are doing:
Change the twirl rate to 5 degrees.
Click and hold on your ellipse and drag a little bit while it is twirling. Just a little – the red on the image to the left is the path of my mouse. As you can see, I didn’t move it much.
This takes some trial-and-error to figure out how to get it to look like what you want. Once you are satisfied with your galaxy shape, move on to the next section.
The Fill Effects
In order to make our twirly ellipse look like a galaxy, we just need to apply a few effects to our shape fills.

Since galaxies are usually on a black or dark background, make a rectangle (either use the Rectangle Tool or type M and drag out your rectangle) with a black fill.
In the Layers panel, drag this layer below your galaxy layer to move it to the back.
Change the galaxy fill to white so we can see our effects.
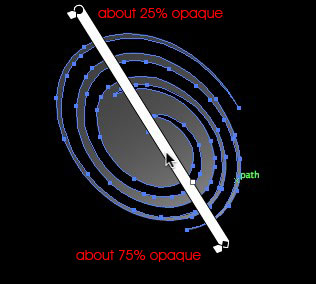
Now on to the effects!First, change the White Fill to a transparent white gradient. (don’t know how to use gradients? Check this tutorial)
One end should have an Opacity value of about 25%, the other should have one of about 75%.
Press G to use the Gradient tool and drag the gradient across the ellipse as shown.
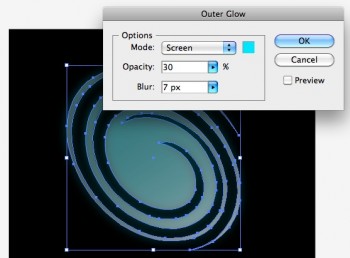
In the Appearance panel, select the Path (rather than the individual Fill).
Go to Effects>Stylize>Outer Glow.
Change the color to a bright aqua and the rest of the settings as shown to the left.
Notice how even though it is an “outer glow”, it creates a soft aqua throughout the whole shape as well. That is because our Fill is transparent, so this outer glow shows through.
Click Ok.
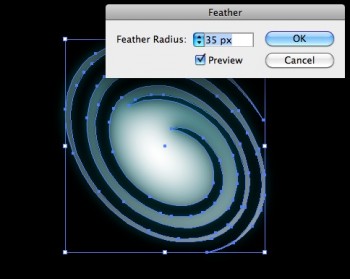
Add a new fill (click the New Fill button in the Appearance panel) and change it to white.
Select the new fill. We want the next effect to apply only to this fill.
Go up to Effects and choose Stylize>Feather.
Change the Feather amount so that the white fills only the larger areas of the galaxy, like the center. I used about 35 pixels.
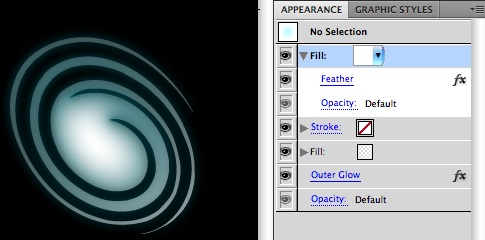
Here’s the galaxy so far, and what the Appearance panel looks like.
Final Touches
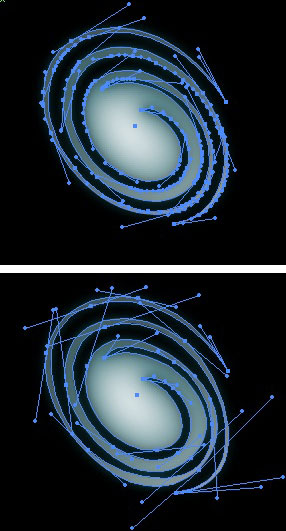
To make the arms a bit more irregular, I like to go in and edit the individual points using the Direct Selection tool (A).
However, if you click on the path you will find that there are way too many points to edit easily (left, top).
Fortunately, this is an easy fix.
Go up to Edit>Path>Simplify.
You can tweak the number of points and the accuracy in the dialog box, as well as turn the original on and off to compare.
When you are happy with the amount of points and the accuracy of the curves, click OK.
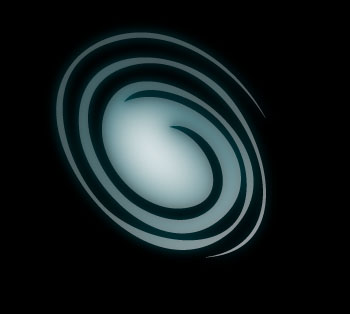
This is what I ended up with. If you like how it looks, you could stop here, since simplifying has created some irregularity in the curves.
However, I want to make some of the arms thicker. If you wish, edit the points with the Direct Selection Tool (shortcut A), tweaking the anchor points and handles.
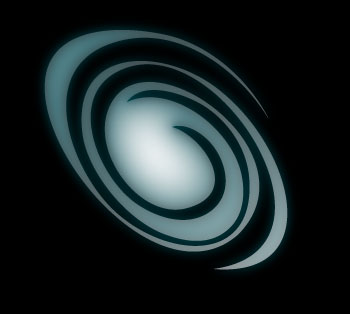
Here is my finished result!Note that when editing the points, I emphasized the length of the ellipse by pulling out the arms at the top left and bottom right, and kept the ellipse arms thin throughout the middle.
Now your galaxy can fit into any space scene! And since it is a vector shape, you can easily scale it to whatever size you need!
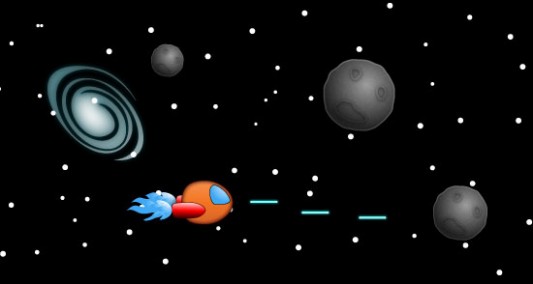
Are there other space sprites you want to know how to make? Let me know in the comments!


